What a Roof Inspection Actually Involves (And Why We Don't Use Drones)

When a contractor says they inspected your roof, what did they actually inspect?
A few aerial photographs may show missing shingles, large debris, or an obvious hole. But a roof is more than its visible surface. The problems that determine whether a roofing system will continue protecting your home are often found through close physical examination: on the roof, around its flashing, and inside the attic.
That is why Peninsula Roofing Company does not use drones for roof inspections. Our inspections are hands-on diagnostic evaluations designed to answer a more useful question than “Does the roof look acceptable from above?”
The question is: What condition is the entire roofing system in, and can it be repaired rather than replaced?
A Roof Inspection Starts With a Conversation
Before anyone climbs a ladder, a good inspection begins with questions.
We want to know:
How old is the roof?
Has it leaked before?
Has anyone made repairs or installed a roof over an older roof?
Did the problem begin after a particular storm?
Where does the water stain appear?
Does it show up during wind-driven rain, a straight-down downpour, or heavy snow and ice?
Has the stain grown, disappeared, or returned?
The location and timing of a ceiling stain can provide important clues. Water does not always enter directly above the spot where it appears inside the house. It may travel along decking, rafters, insulation, or framing before reaching the ceiling.
That background helps an inspector focus the evaluation instead of treating every leak as the same problem.
Step 1: A Ground-Level Walk-Around
The next step is an exterior inspection from the ground.
This includes looking at the overall roofline for sagging, uneven areas, deflection, and other signs that may point to decking or structural concerns. We also examine:
Gutters and downspouts
Fascia and soffits
Drip edge
Roof-to-wall intersections
Chimneys and siding transitions
Valleys and lower roof edges
Areas where water may collect or discharge improperly
The surrounding property can provide additional evidence, especially after a storm. Dented air-conditioning fins, torn window screens, pockmarked siding, damaged exterior fixtures, and fallen roofing material may indicate hail or wind damage even when the roof does not show an obvious problem from the driveway.
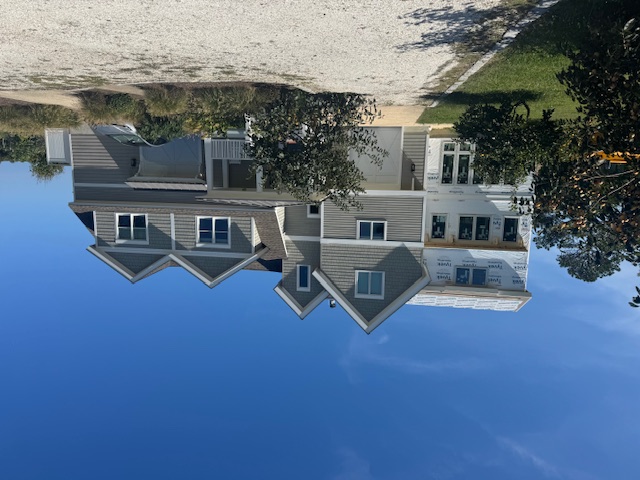
A ground-level inspection is not a substitute for getting on the roof, but it establishes context. It also helps identify areas that deserve closer attention once the roof surface is reached.
Step 2: Examining the Roof Surface in Detail
When conditions and access allow, a proper inspection continues on the roof itself.
The inspector examines the shingle fields, ridges, hips, valleys, edges, and every roof penetration. The goal is not simply to count missing shingles. It is to evaluate how the roofing components are performing together.
Hail damage is not always visible from above
Hail bruising is one example of why a drone cannot provide the whole answer.
A hailstone can fracture the asphalt mat beneath the shingle’s granule surface without causing dramatic displacement or a large visible hole. The shingle may still look relatively normal in an aerial photograph. Physical examination is needed to identify bruising, weakened areas, and abnormal softness.
The same applies to shingle tab seal integrity. An inspector needs to evaluate whether tabs are properly sealed or have lifted and become vulnerable to wind. A photograph cannot determine how firmly a tab is bonded.
Flashing requires close inspection
Flashing is examined detail by detail around:
Chimneys
Sidewalls and headwalls
Valleys
Skylights
Plumbing vent boots
Dormers
Roof edges
Other penetrations and transitions
We look for open gaps, lifted metal, corrosion, failed sealant, exposed fasteners, and signs of past patching. A small gap at a flashing transition can allow water behind the roof covering and into the structure.
At roof-to-wall intersections, J-channel and other flashing should never be installed flush with the roof surface. They need to be held slightly above the roof so water forced behind the siding has a path to drain. Caulking that gap shut may appear watertight at first, but it can trap water and redirect it into the wall or roof assembly.
This is one reason a close inspection matters. A drone may show that a wall intersection exists, but it cannot reliably evaluate the drainage detail from several feet in the air.
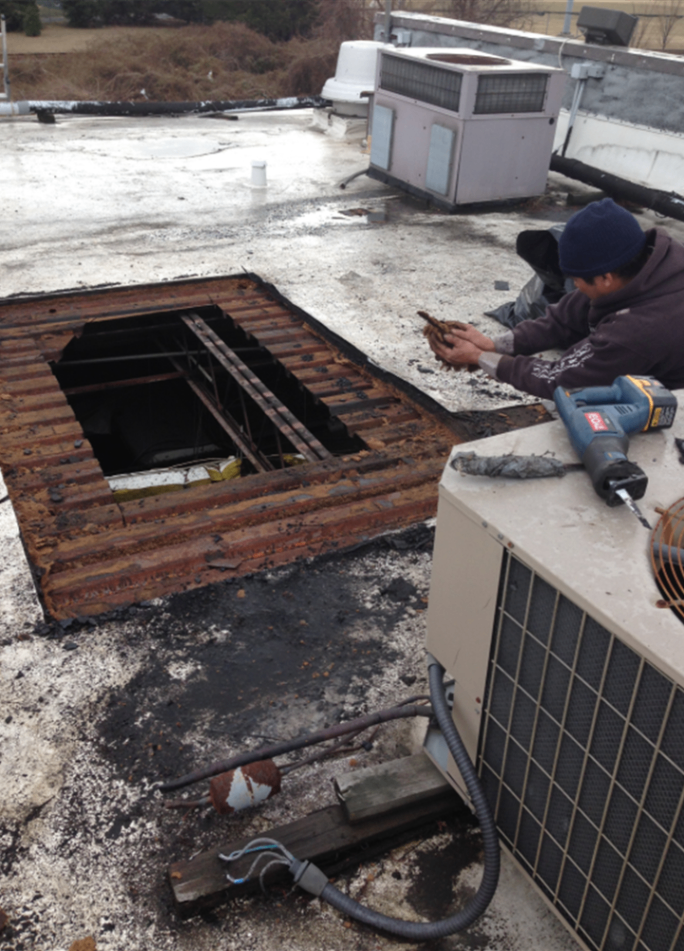
Step 3: Walking Through the Attic
The attic is one of the most important parts of a roof inspection, and one that aerial imagery cannot reach.
From inside, we inspect the underside of the roof decking and surrounding framing for:
Water stains
Damp or displaced insulation
Soft, sagging, or deteriorated decking
Daylight visible through boards
Mold or mildew
Rusted fasteners
Condensation
Evidence of repeated leaks
Signs of inadequate ventilation
A roof can appear flawless from above while the attic tells a different story. A small flashing failure may leave a limited exterior clue but cause staining or deterioration underneath. Likewise, condensation from a ventilation problem can create moisture damage that is not caused by a roof leak at all.
In our climate, attic insulation commonly needs to be in the approximate range of R-49 to R-60, depending on the structure and applicable requirements. However, more insulation is not helpful if it blocks soffit intake vents. A complete evaluation checks whether insulation is interfering with airflow and whether intake and exhaust ventilation are balanced.
The inspector looks at the relationship between soffit intake, ridge or other exhaust ventilation, insulation, and moisture. Poor balance can contribute to condensation, mold, premature shingle aging, and decking deterioration.
For more on the difference between roof leaks and attic moisture, see our guide to attic condensation versus roof leaks on Delmarva.
Why We Do Not Use Drones for Roof Inspections
Drones can capture useful surface photographs. They may document a roof layout or provide a general record after a storm. But drone imagery is not a replacement for an inspection.
Here are the specific reasons Peninsula Roofing does not use drones:
1. Aerial imagery only sees the surface
A drone cannot feel a soft area in the decking, test whether a shingle tab is sealed, or identify hail bruising hidden beneath the granules.
It may show a missing shingle or a large puncture, but many roofing failures begin with subtler conditions that require physical examination.
2. A drone cannot inspect the attic
Water stains on decking, damp insulation, mold, displaced insulation, daylight, and ventilation problems are interior conditions. No aerial scan can evaluate them.
The attic walkthrough is often where hidden moisture is found before it reaches a ceiling or causes visible damage inside the living space.
3. A photograph cannot determine remaining service life
Remaining roof life depends on more than age or overall appearance. An inspector needs to evaluate granule loss, shingle flexibility, sealant condition, flashing integrity, exposed fasteners, and the effects of previous repairs.
This is particularly important in Delmarva. Coastal humidity and salt air can shorten material lifespans by approximately 15% to 25% compared with inland estimates. A roof’s actual condition must be judged in the environment where it has been serving, not from a generic age chart or aerial pattern.
4. Local restrictions and privacy concerns also matter
Restricted airspace and privacy concerns in our area rule out drone use for Peninsula Roofing. More importantly, using a drone would not give us a better answer. We would still need to inspect the roof closely and walk through the attic to understand the system’s true condition.
The issue is not whether drones can produce clear pictures. They can. The issue is whether pictures alone are enough to make a responsible repair-or-replace recommendation. They are not.
What You Should Receive After an Inspection
A professional roof inspection should end with more than a verbal statement or a few pictures on a phone.
You should receive documentation that explains:
What was inspected
Which conditions were found
Where those conditions are located
Which issues require immediate attention
Which items can be monitored or maintained
Whether the roof appears repairable
Whether replacement is recommended and why
What evidence supports that recommendation
Photos are useful when they are tied to a clear explanation. A good report should help you understand the difference between active damage, normal aging, deferred maintenance, and a condition that threatens the roof system.
Not every roof needs to be replaced. In many cases, a targeted repair, flashing correction, ventilation improvement, or maintenance plan may be the appropriate solution. A proper inspection is what determines whether that is possible.
Why Early October Is a Good Time to Schedule
Early October is the last reliable stretch of the year for inspections and many resulting repairs in Salisbury, MD, and throughout Delmarva.
Roofing sealants and adhesives generally need temperatures above approximately 40 to 50 degrees Fahrenheit to cure properly. As temperatures fall, installation becomes more weather-dependent, sealants may take longer to set, and repair schedules can become less predictable.
Scheduling an inspection now gives you time to:
Identify storm or weather damage
Make repairs before colder conditions arrive
Plan a replacement if one is genuinely necessary
Address attic moisture and ventilation problems
Avoid waiting until a winter leak becomes an emergency
If you are comparing roofing companies in Salisbury, MD, ask each contractor whether the inspection includes the roof surface, flashing, attic, ventilation, and written documentation. If you are looking for a roofer in Salisbury, those questions are more useful than simply asking whether the company uses a drone.
A Hands-On Inspection From a Company That Has Served Delmarva Since 1947
Peninsula Roofing Company has served Delmarva for more than 75 years, since 1947. Our residential and commercial teams provide free in-person inspections, repair-versus-replace guidance, roof maintenance, replacement services, and 24/7 storm response.
For replacement projects, we handle the permit process and explain the proposed scope before work begins. Financing options are available for qualifying projects, and we work with property owners to find cost-effective solutions rather than automatically recommending a full replacement.
Whether you are searching for Salisbury roofers, researching roofing in Salisbury, MD, or need emergency help after a storm, start with a complete inspection, not a surface scan.
Schedule a free in-person roof inspection before the cold arrives, or call Peninsula Roofing Company at 410-742-6163.
Comments